Step 2: Create and Manage Your Project
With the environment set up, it's time to establish your creative base. A good habit of organizing folders will make your development journey much smoother.
1️⃣ Establish Your "Workspace"
We recommend that you first create a general "workspace" folder on your computer to uniformly store all your future ArenaPro projects. This is like creating a dedicated workshop for all your tools and blueprints, making them easy to manage and find.
- On your computer, choose a suitable location (e.g., "Documents" or D drive) and create a new folder to store all your Box3-related code projects.
- Name it, for example,
ArenaPro_ProjectsorMyGames. - Open this folder in VS Code:
- Launch VS Code.
- Go to the top menu bar
File>Open Folder, and select theArenaPro_Projectsfolder you just created.
Warning
⚠️ Folder Naming Convention Project names and paths can only contain English letters, numbers, and underscores. Do not use Chinese characters, spaces, or special symbols, as this will cause code compilation to fail later!
- Correct example:
my_awesome_game - Incorrect example:
我的超酷游戏(My Awesome Game)
2️⃣ Create a New Project in the Workspace
Now that your VS Code window is focused on the workspace, let's create our first real project in this "workshop."
Launch the Project Wizard:
- Press the shortcut
F1(orCtrl+Shift+P/Cmd+Shift+P) to open the VS Code command palette. - Type
New Arena-Ts Projectand select the corresponding command.
- Press the shortcut
Select a Project Template:
- In the options that appear, follow the prompts given by the wizard.
- If you are asked
Ok to proceed? (y), typeyand press Enter to continue. 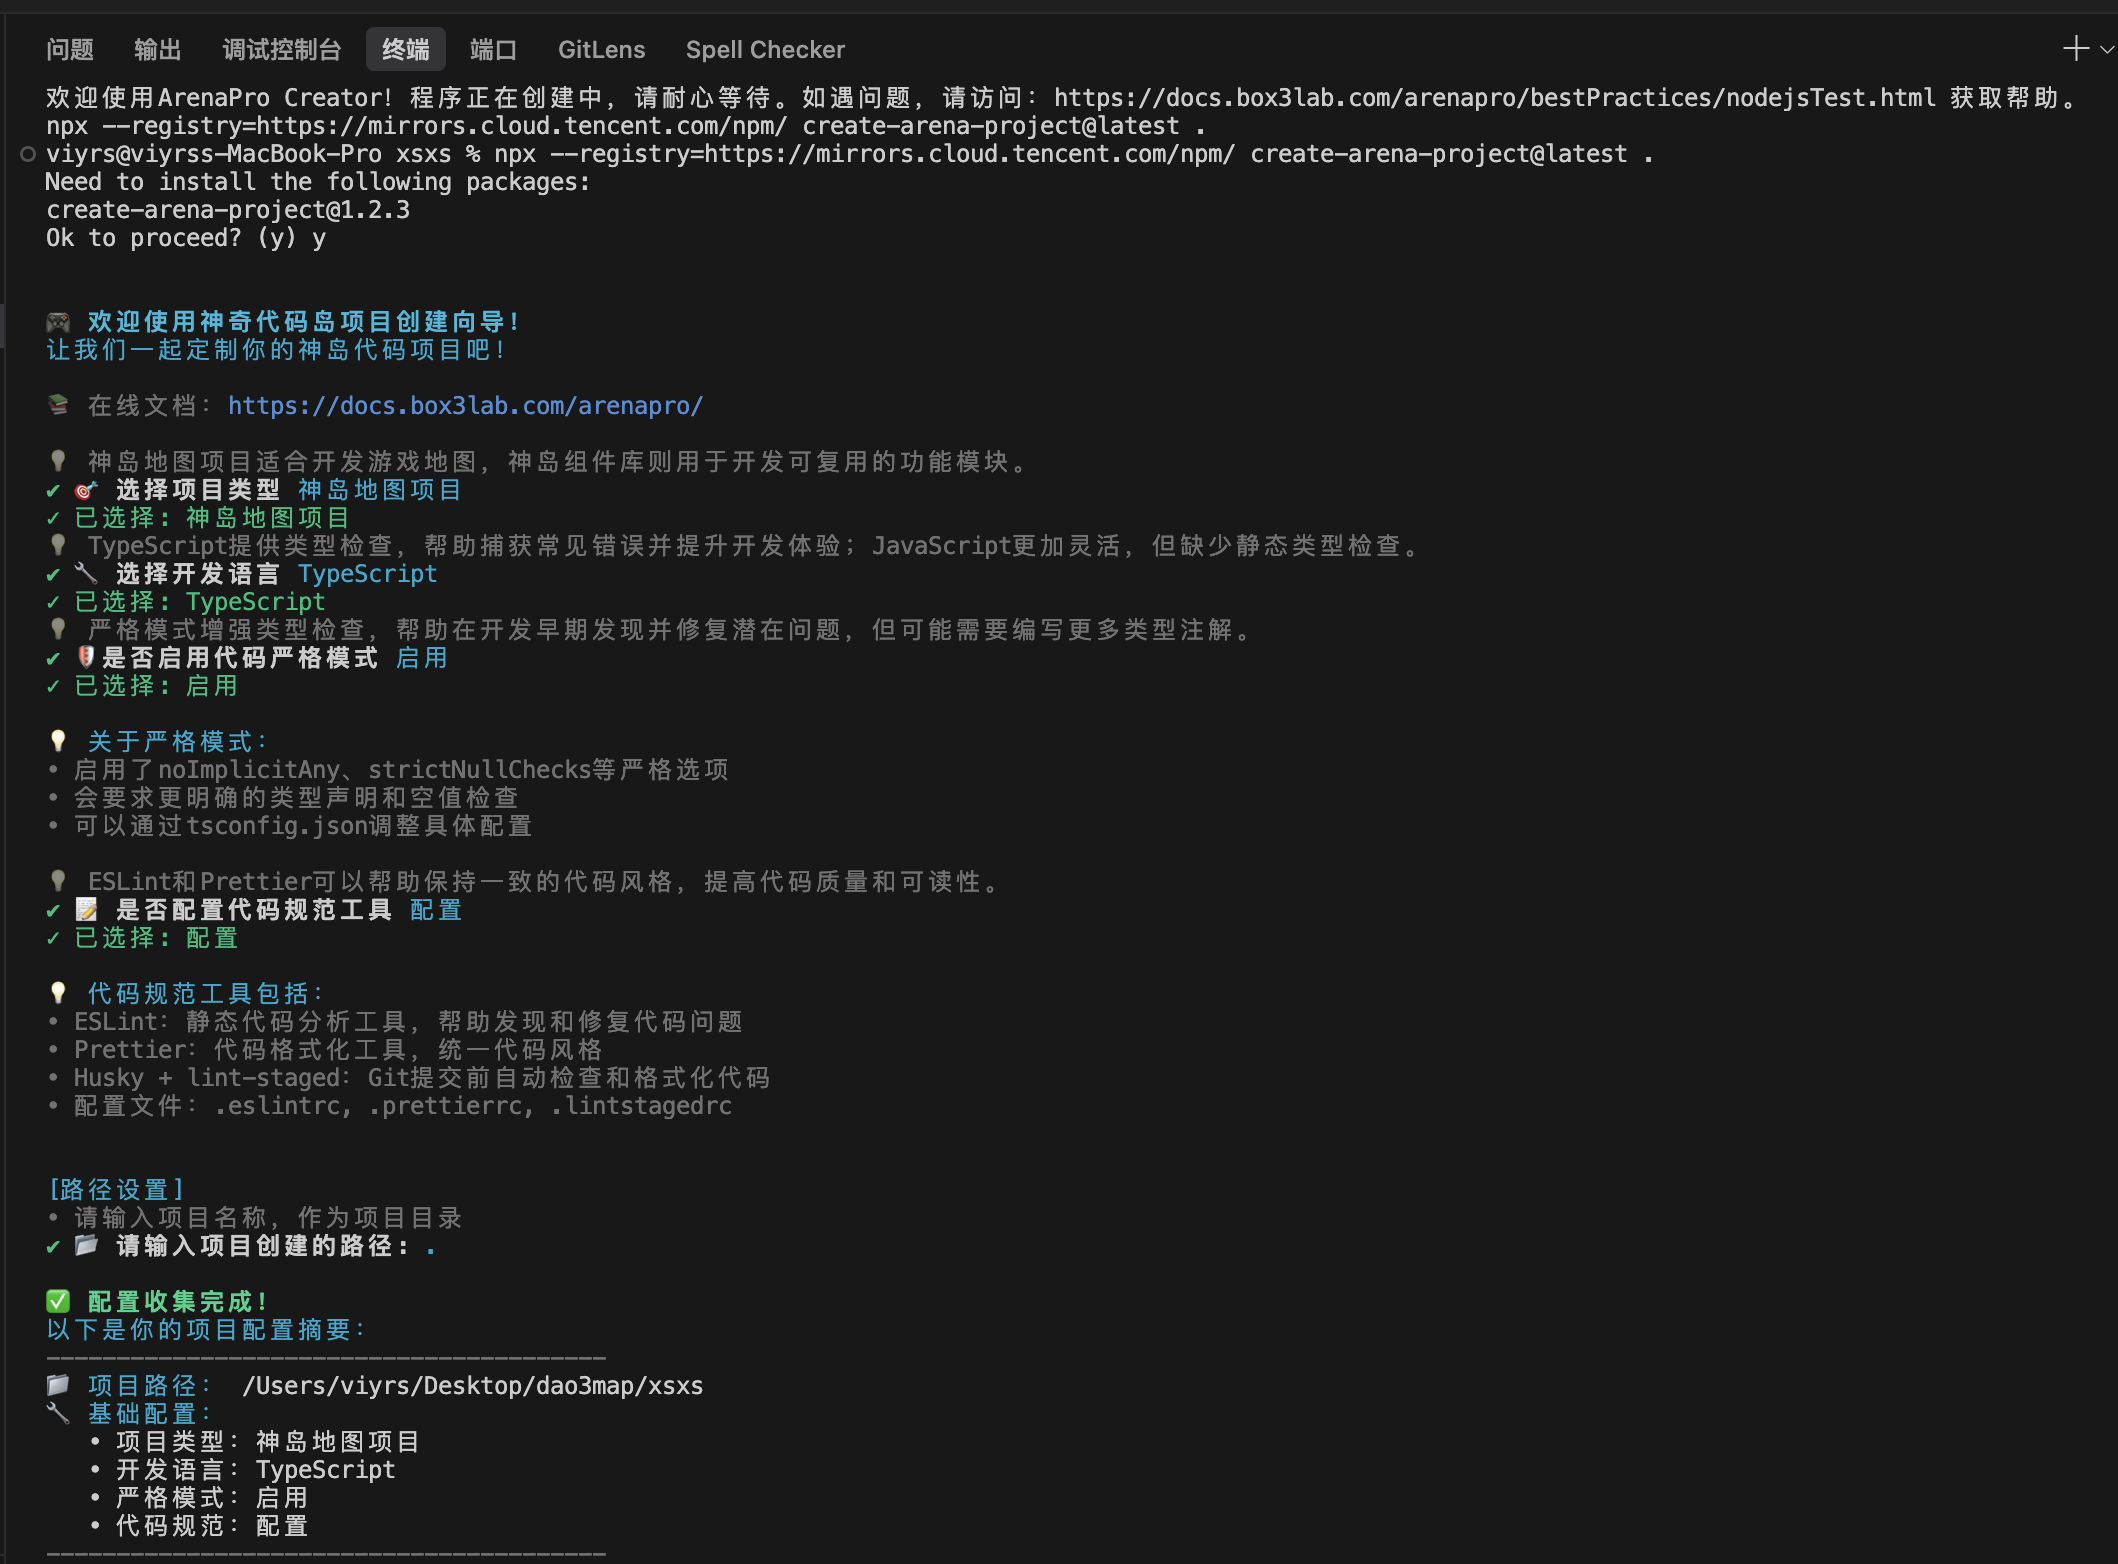
Confirm Location and Name:
- The wizard will ask you to select a parent folder to store the project.
- Next, name your project. In the input box that appears:
- Enter a new name (recommended): For example,
my_first_game, then press Enter. This will create a new folder with the same name to store the project. - Enter
.: If you want to place the project files directly in the currently open folder, type a period.and press Enter.
- Enter a new name (recommended): For example,
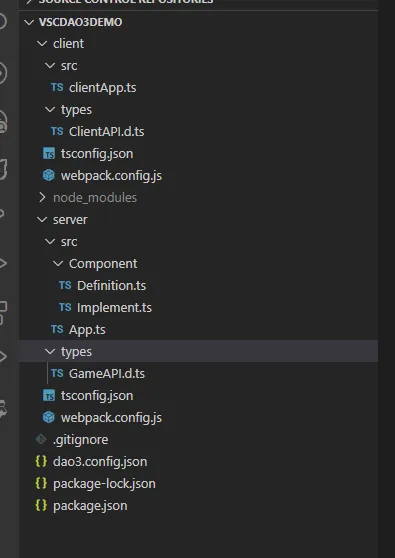
✅ Project Ready
Great! Your first project has been successfully created and is now open in VS Code. The file explorer will show the standard project structure:
client/- Stores client-side codeserver/- Stores server-side codedao3.config.json- The project's configuration file- ... other configuration files
Now, your local "arsenal" is ready. Next, we will connect it to the "battlefield" in the cloud.
Important Next Step: You Need an "Extended Map"
Before we connect your local project to the cloud, please ensure that you have at least one "Extended Map" under your Box3 account.
All of ArenaPro's powerful features (like code uploading, HMR hot reloading, breakpoint debugging, etc.) can only be used in an "Extended Map."
- What is an Extended Map? How is it different from a regular map?
- If you don't have one yet, please go to the Box3 official website to create one first.
Please continue reading: Step 3: Connect to the Cloud.