Step 1: Install the Development Environment
Welcome to the world of ArenaPro! Before you begin your creative journey, we need to set up a professional development environment. This chapter will guide you through installing all the necessary tools, laying a solid foundation for your future development work.
📋 Environment Requirements
| Tool | Version Requirement | Purpose |
|---|---|---|
| VS Code | v1.9.0+ | A professional tool for writing code and managing projects. |
| Node.js | v20+ | The basic runtime environment required for code compilation and packaging. |
| ArenaPro Plugin | Latest Version | The core plugin connecting VS Code with the Box3 platform. |
1️⃣ Install VS Code (Visual Studio Code)
VS Code is a powerful and free code editor that will be your primary tool for writing code and managing projects.
If you already have VS Code installed, you can skip to the next step.
- Visit the official website: Open the VS Code official website.
- Download and install: Click the download button on the homepage to get the installer for your operating system, then follow the default settings to complete the installation.
- Localize the editor (Optional): Click to install the Simplified Chinese Language Pack. After installation, click the prompt in the lower-right corner to switch the language.
2️⃣ Install Node.js
Node.js is the essential underlying environment that ArenaPro uses for important tasks like code compilation and packaging.
If you already have Node.js installed, you can skip to the next step.
- Visit the official website: Open the Node.js official website.
- Download and install: Click the download button on the homepage to get the installer for your operating system, then follow the default settings to complete the installation.
Verify Installation
After installation, we need to verify it in the "Terminal." The terminal is a tool for interacting with your computer by typing text commands.
The easiest way is to use the built-in terminal in VS Code:
- Open VS Code.
- From the top menu bar, select
Terminal>New Terminal. - In the panel that appears at the bottom, type the following command and press Enter:
node -vIf you see a version number, it means you have successfully installed it.
❓ Command not found? If the terminal reports that the
nodecommand is not found or cannot be recognized, it's usually because the system's environment variable (PATH) has not been refreshed after the new installation. Please try the following:
- Restart VS Code: Completely close all VS Code windows and then reopen it.
- If the problem persists, restart your computer. This will force the system to load all the latest configurations.
Alternatively, you can use your system's built-in terminal (Click to expand)
- For Windows users:
- Press the
Winkey, typecmdorPowerShell, and then open it.
- Press the
- For macOS users:
- Find
Terminalin theOtherfolder inLaunchpad. - Or, press
Cmd + Space, typeTerminal, and open it.
- Find
3️⃣ Install the ArenaPro Creator Plugin
This is the final step. The ArenaPro plugin is the bridge connecting VS Code and the Box3 platform.
- Open VS Code.
- Access the Extension Marketplace: Click the "Extensions" icon (the four-square symbol) on the left sidebar of VS Code.
- Search and install: In the search box, type
ArenaPro Creator, find the plugin, and click the "Install" button.- You can also click this link to install it directly: Install ArenaPro Creator Plugin.
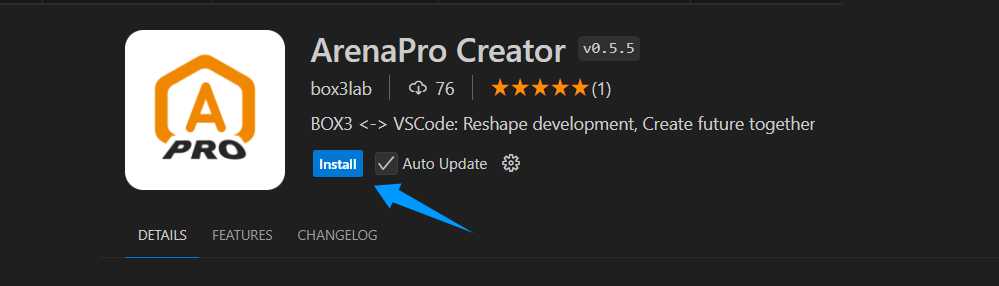
After the plugin is installed, it will automatically check if your Node.js version meets the requirements. If everything is fine, your development environment is now fully set up.
✅ Installation Complete
Congratulations! You can now proceed to the next chapter to learn how to Create Your First ArenaPro Project.
Your development environment is now ready. In the next guide, we will create our first ArenaPro project together.